


What is Portrait Photography?
Portrait photography is normally of a person or group of people that shows the expression, personality or mood of the subject. The focus of the photograph is usually the person's face, although the entire body or background/environment are sometimes may be included.
There are 4 main types:
Environmental - This is capturing a person in a place or setting, to show what they do (e.g: A headteacher outside a school)
Candid - This is capturing a moment in action, the person can just be doing their everyday activities. At times the subject may not know your their (e.g: A athlete running)
Formal - This is emphasizing the person and nothing else, normally you would have a clear background (e.g: A school photo)
Self-Portrait - This is capturing yourself (e.g: Selfies)
David Woolfall

David is a portrait photographer based in London. He graduated from The Kent Institute of Art and Design in 1998 with a first class Hons Degree. He then went on to assisting commercial photographers and work on his own personal projects.
David is a now an experienced award winning editorial photographer based, working for international magazines shooting stories and individual portraits. His personal work has been exhibited widely and he has recently received awards in, International Creative Competition and The International Photography Awards.
Here is some of his portraits:

|
This picture has a medium depth of field as it has a blurred out background. This picture is mainly focusing on the mans face, as he's looking directly down the camera. The photographer would have probably used the setting shade on white balance as its taken outside but is shaded by the taxi.
|
|
This picture would be environmental portrait as a dance judge is doing a pose of a dance move. This would give the viewer an idea of what his job is. Everything is in focus so the photographer has used a large depth of field. The photographer would have set the white balance to daylight as it's been taken outside.
|

|

|
This picture has used a medium depth of field as the background is blurred out. The lady in the picture is staring in the distance as though it is candid portrait even though it's not a massive movement in action. The photographer would have used tungsten for the white balance as its inside. A compositional triangle has been used within this picture.
|
|
This would be environmental portrait. The man in the picture is an author and he is with loads of books, this picture is showing what his job is. The photographer must have used a large depth of field as everything is in focus and the exposure is perfect.
|

|
Bob Martin

Bob Martin is a multi-award winning sports photographer, specializing in shooting action, graphic, and editorial pictures for advertising, corporate and editorial clients.
Bob Martin’s photography has been recognised by than 57 national and international awards. He is a three time winner of the prestigious British Sports Photographer of the Year also having won the World Press Photo Sports Picture in 2005.During the London 2012 Olympics he was appointed as the overall Photo Chief based in the MPC.
In his 30 years of his career he has photographed every major sporting event; from the last fourteen Summer and Winter Olympics, to Elephant Polo and Horse Racing on ice. His work has taken him all over the world and his photographs have been published in numerous publications such as: Sports Illustrated, Time, Newsweek, Paris Match,the Sunday Times, the New York Times and many more!
Here is some of his work:

|
He has taken this picture from a worms eyeview. This would be a type of environmental portrait photography as its capturing a rider with his horse. Only they are in focus so there has been medium depth of field used.
|
|
This picture would be a type of candid portrait photography, as it's capturing a cyclist in action on his bike. The photographer may have used birds eyeview to take this picture. The focus point is just on the cyclist as the surroundings are blurred out. The photographer must have used a fast shutter speed to capture this.
|

|

|
This is quite a formal example of portrait photography, as it's just emphasizing on the footballers face. The photographer has used a spotlight on him with a black background to make him stand out. There is a small depth of field as only he is in focus and the background is blurred out.
|
|
This is a type of candid photography as it's capturing a skier in action of a jump. There is a large depth as the skier and the background are all in focus. This picture has been taken outside therefore the white balance used would have been set on Daylight.
|

|
SHOOT 1 - Self Portraits
For this shoot I used the self timer on the camera, the purpose of a self timer is to delay the shutterspeed so you have enough time to position your camera correctly and get into range of the camera. I had to set the self timer to 10 seconds, then set the focus point and exposure as I looked through the viewfinder to imagine where I'd be.
If I was to do this again I'd use a tripod to make sure my camera was secure and this would prevent my pictures from coming out blurred also I'd ,make sure I set the white balance to Fluorescent in all of my pictures.
If I was to do this again I'd use a tripod to make sure my camera was secure and this would prevent my pictures from coming out blurred also I'd ,make sure I set the white balance to Fluorescent in all of my pictures.


Worst Picture...

|
This would have to be the worst picture from this shoot as the camera did not stay in it's position making is turn out blurred. This picture is also slightly over exposed and the focus point wasn't set correctly, also my face wasn't included.
|
Best Picture...
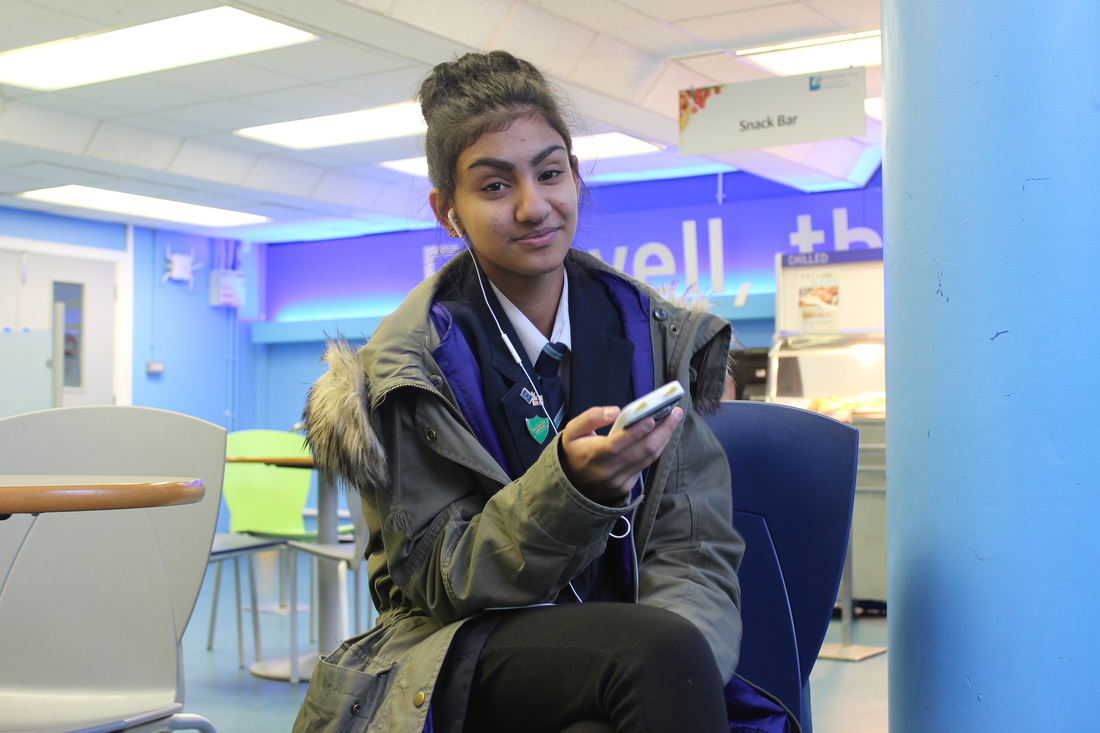
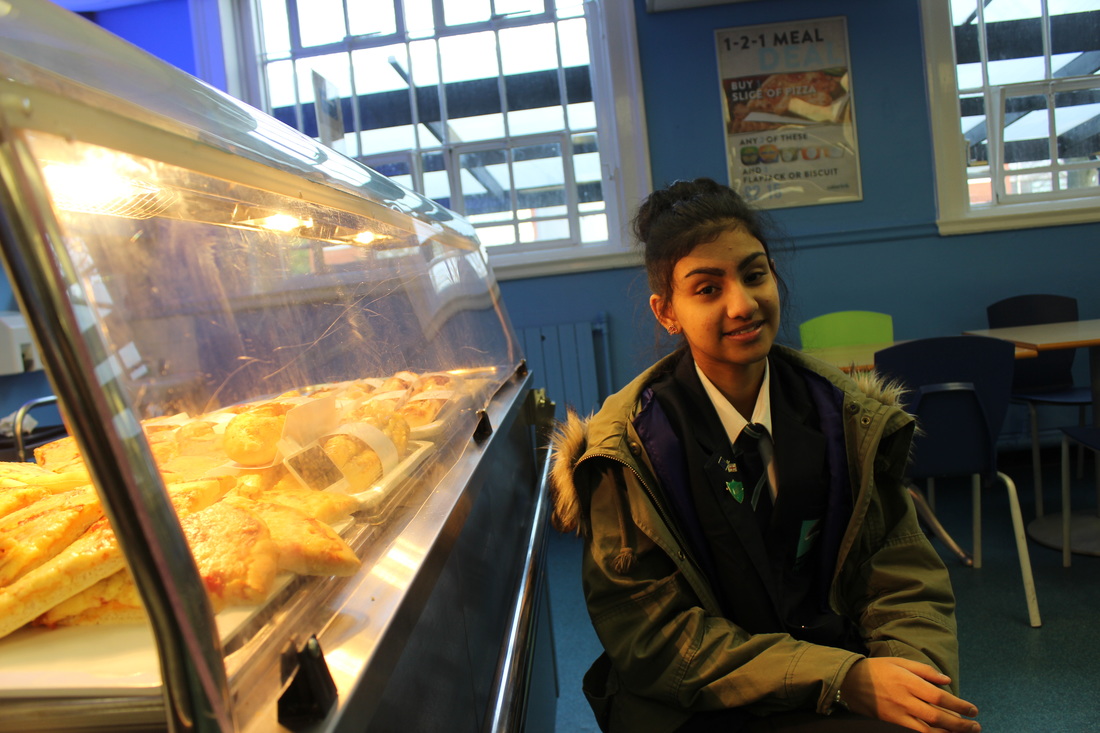
This would have to be the best picture from this shoot as the focus point is correctly set on me. Also the camera has stayed in the position it was set so it's not blurred. Also this picture has a medium depth of field as only the background is blurred. In the picture my interests have been shown as I like listening to music and being on my phone which is what I'm doing in the picture. It is perfectly exposed and I used the white balance of Fluorescent as I have taken this picture indoors. Within this picture I have used the rule of thirds as I am centered within the middle column. As well as this I have used good balance of colours, which is similar to David Woolfall's picture of the author.
SHOOT 2 - Emotion photo
For this shoot I decided to capture everyday emotion this would be candid portrait photography. I had to set my focus point onto the persons face and I zoomed in to create more of an effect. I most of my pictures I have a small depth of field making my person stand out more as the background is blurred out. The main emotions I captured were: happiness, disgust, anger, shyness, confused and sadness. I had to keep changing my white balance as when I was inside it was set to Tungsten or Fluorescent whereas when I was outside it needed to be set to Daylight.


Worst Picture...
|
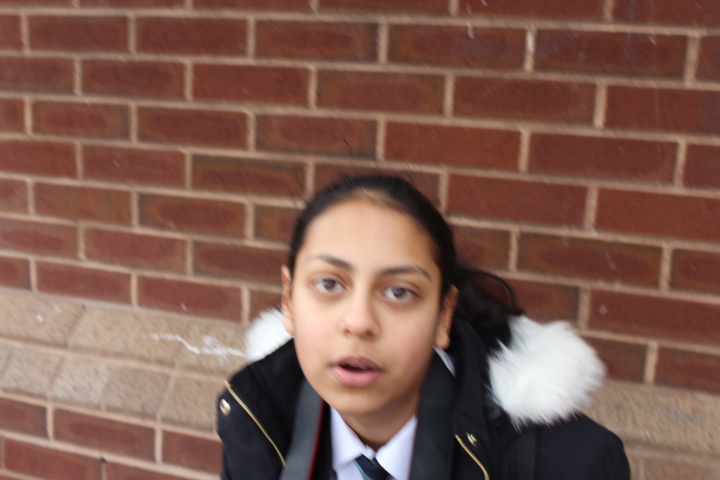
This would have to be the worst picture from this shoot as it is out of focus. It is also too zoomed out as the focus point should just be on the face of the model. Also there is a very small depth of field as only the very bottom of the picture is in focus.
|
Best Picture...

This would have to be my best picture from this shoot as it has the correct focus point directly on the models face. There is a small depth of field as I have zoomed right into the models face and the background is blurred out. The models emotions of her being cold comes through by the position she is in, with her hands inside the cuffs of her coat and then they are on her face. She's looking down the camera at an angle and the picture is perfectly exposed.
Black & White Editing:
Step 1: First I have cropped the picture.
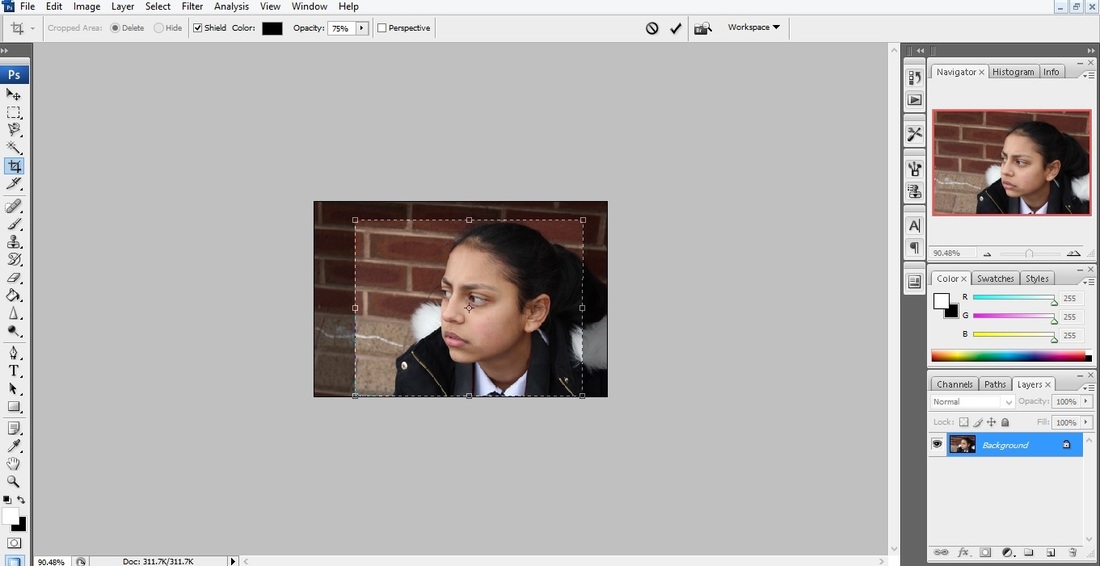
Step 2: I have then changed the picture into Black&White.
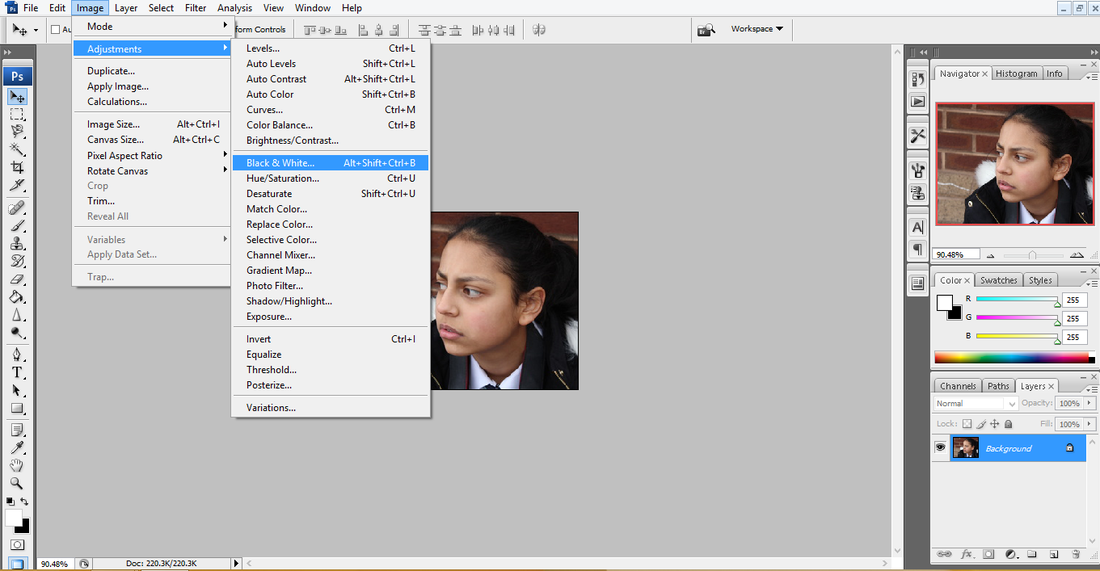
Step 3: I've then made my own adjustments depending on how I believe it should look.

Step 4: To then make it look more professional and make the girl stand out more, I have used the Smudge tool on the brick wall background so its out of focus. Giving the picture a much better look then when I begun.
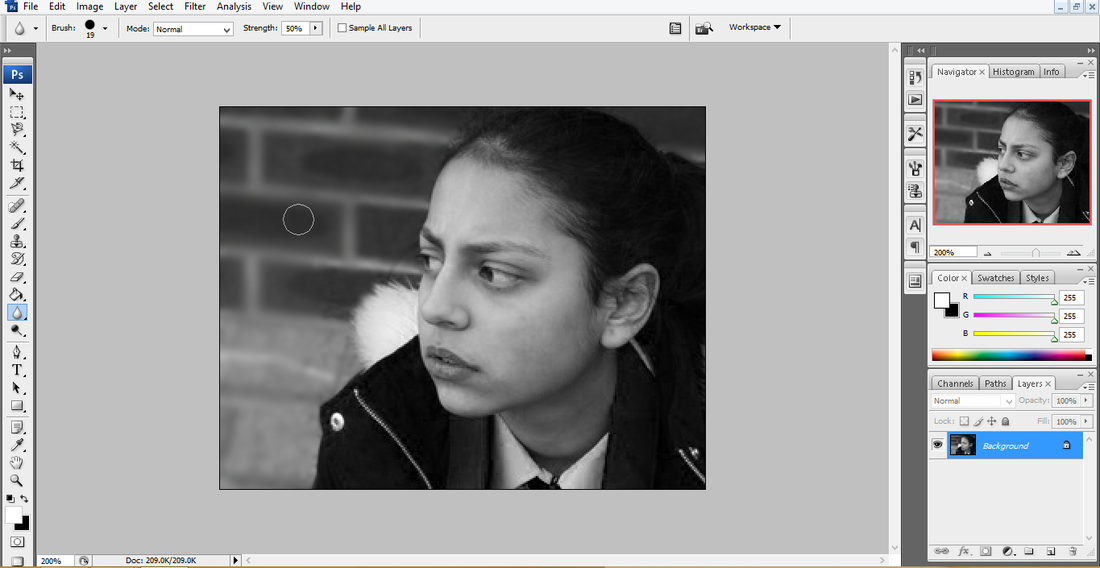
Final Piece...

|

This picture is where I got the inspiration from to turn my photograph, black and white.
|
Shoot 3 - PERSONALITY
Plan:
For this shoot I am going to try capturing my models personality, to do this I will get my model talking to someone else and not looking at the camera to make it seem natural. The focus point is going to be on their face and the aperture is going to be small, F5.6 so the background is blurred out. I am going to use perfect exposure as my model has a cheerful personality and it will be brought out with light exposure. I will be taking them close up to get less of the background in as possible and so the model is the main focus.
For this shoot I am going to try capturing my models personality, to do this I will get my model talking to someone else and not looking at the camera to make it seem natural. The focus point is going to be on their face and the aperture is going to be small, F5.6 so the background is blurred out. I am going to use perfect exposure as my model has a cheerful personality and it will be brought out with light exposure. I will be taking them close up to get less of the background in as possible and so the model is the main focus.


Worst Picture...
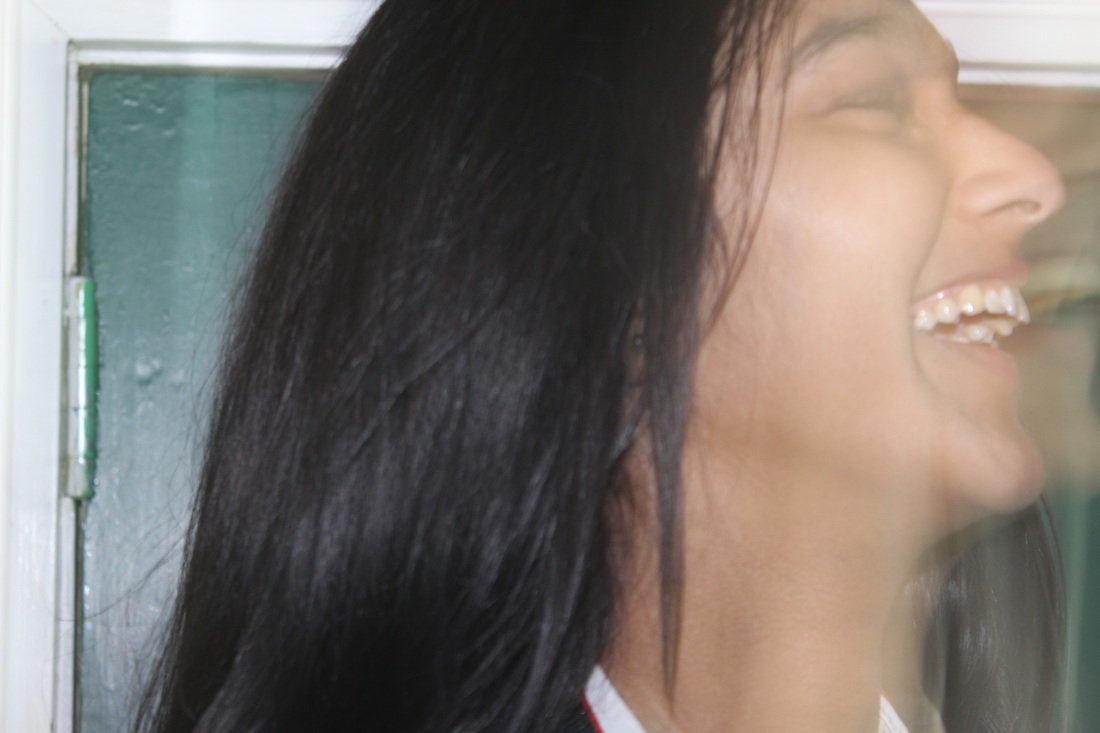
|
This would have to be the worst picture from this shoot because it is out of focus and over exposed. Eventhough I have captured the models personality, she was moving causing it to turn out blurred. The focus point was set wrong as the background was in focus instead of the model.
|
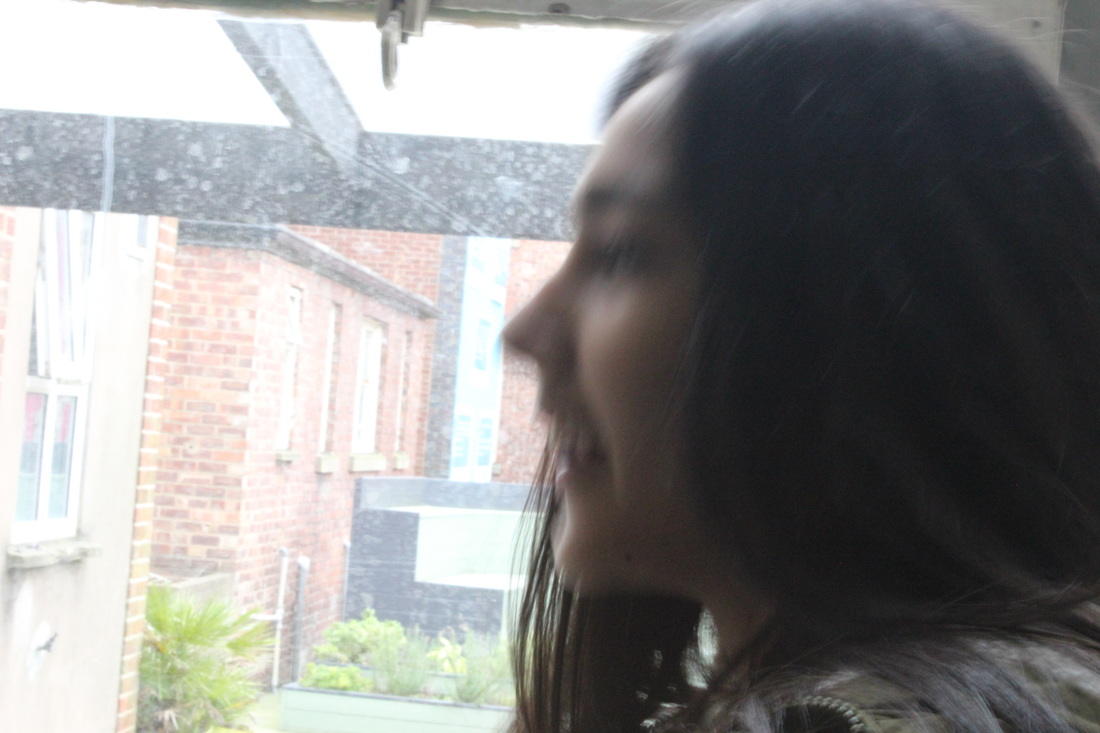
Best Picture...
This picture would have to be the best picture from this shoot because I have zoomed right in on the model's face and the focus point is correctly set onto her face. There is a small depth of field as the model is in focus but the little bit of the background that was shown was blurred out. I like how the model is looking into the distance but you still have some of her personality captured which is happiness. I had set the white balance to Tungsten as I was taking the picture indoor. I like how you can see every feature of the girl's face and hair clearly, as the picture is perfectly exposed.
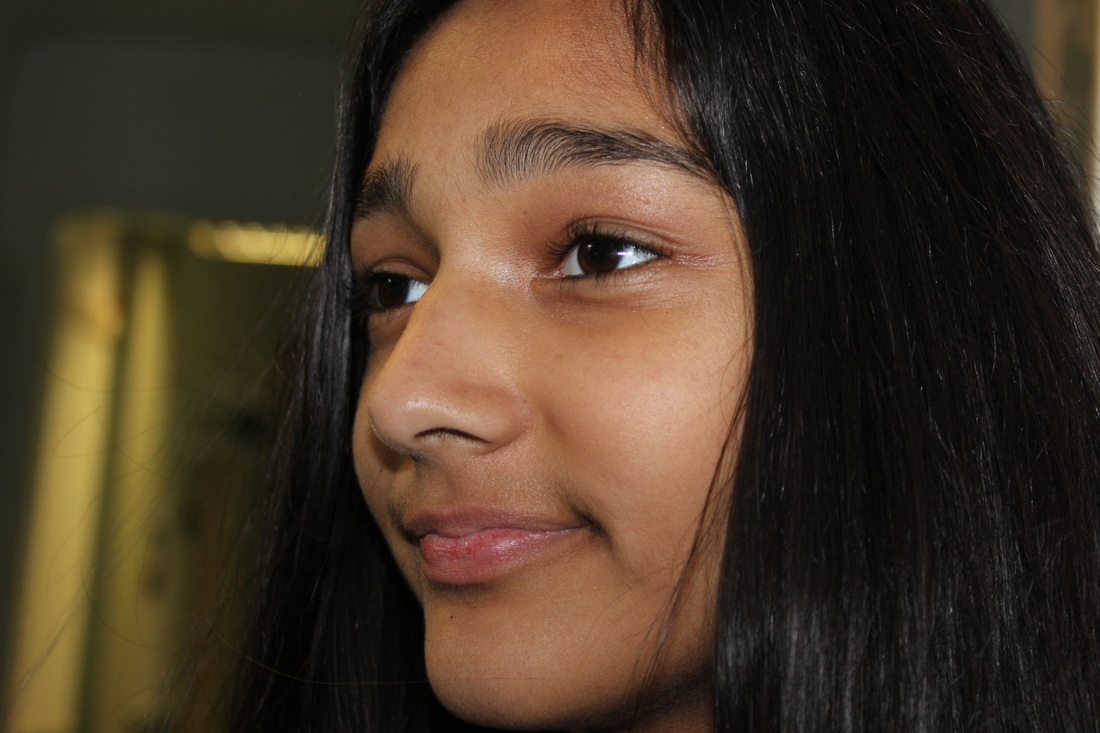
SHOOT 4 - Reflections
Plan:
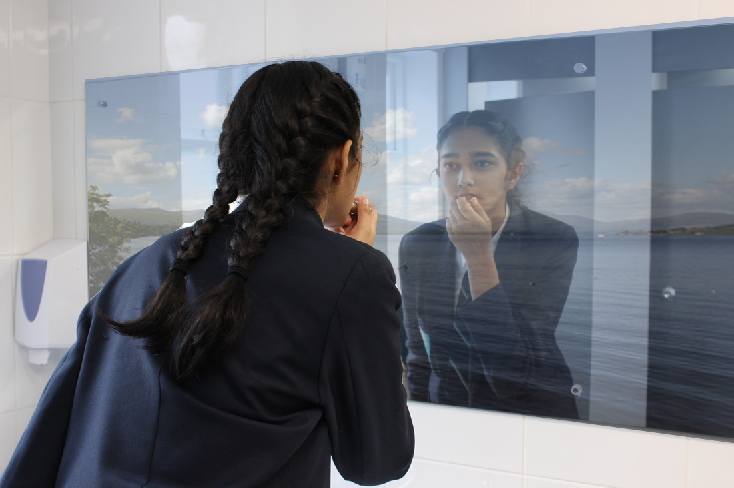
For this shoot I have decided to capture someone and their reflection , to do this I will have my model looking into the mirror. In some shots I will take pictures of just the reflection whereas in others I will take pictures of the girl and her reflection. I want a small depth of field so I'll be using F6, this is so my background will be blurred out but my focus point will be set on the girl or her reflection. I need my pictures to be perfectly exposed and my white balance has to be set to Tungsten as I will be taking the pictures inside.
For this shoot I have decided to capture someone and their reflection , to do this I will have my model looking into the mirror. In some shots I will take pictures of just the reflection whereas in others I will take pictures of the girl and her reflection. I want a small depth of field so I'll be using F6, this is so my background will be blurred out but my focus point will be set on the girl or her reflection. I need my pictures to be perfectly exposed and my white balance has to be set to Tungsten as I will be taking the pictures inside.


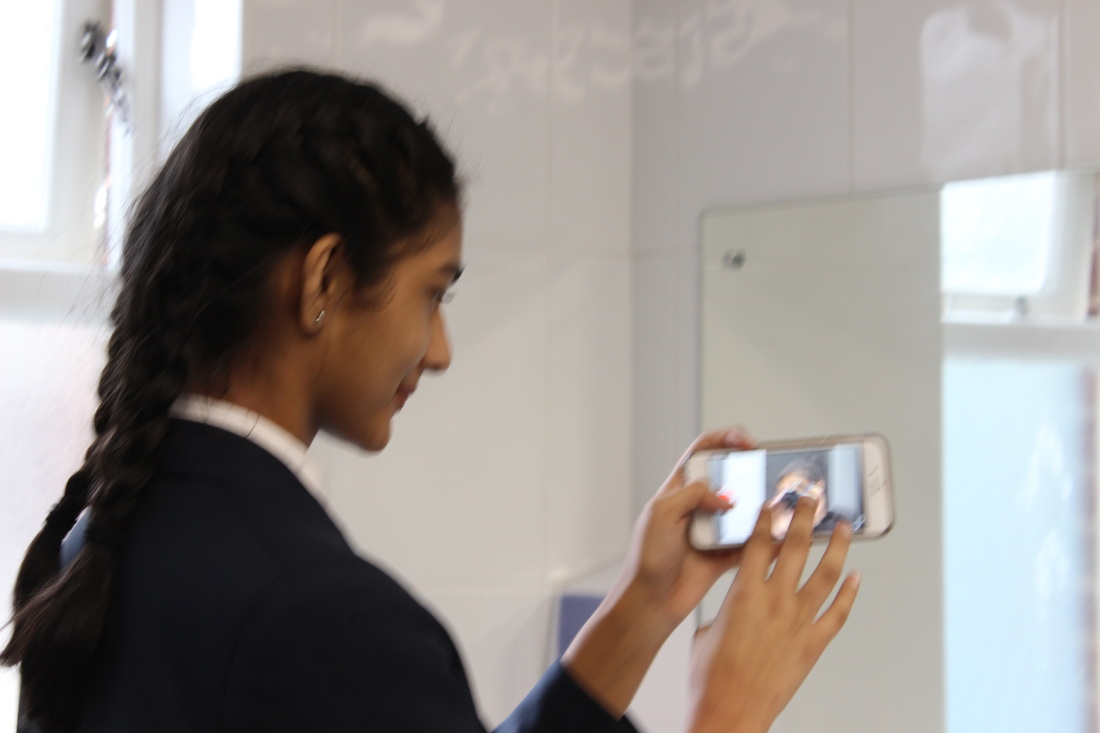
Worst Picture...
|
This is the worst picture in this shoot as it is out of focus, as the focus point wasn't set correctly. If it had been this would have made the picture good as the exposure was correctly set.
|
Best Picture...
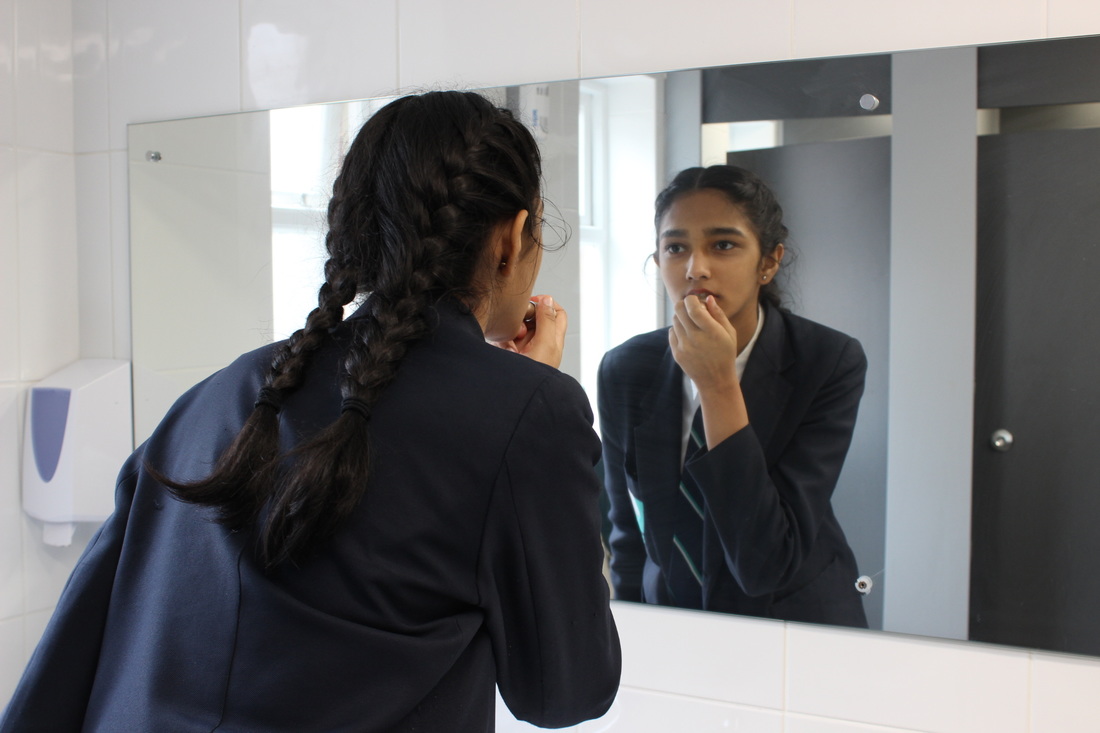
I really like this picture as it is mainly focusing on the reflection but the model is still in range of the shot. It has a small depth of field as the background in the mirror is blurred whilst the girl and her reflection are in focus. This picture is candid portrait photography, I like how the girl isn't looking at the camera and instead it looks natural.
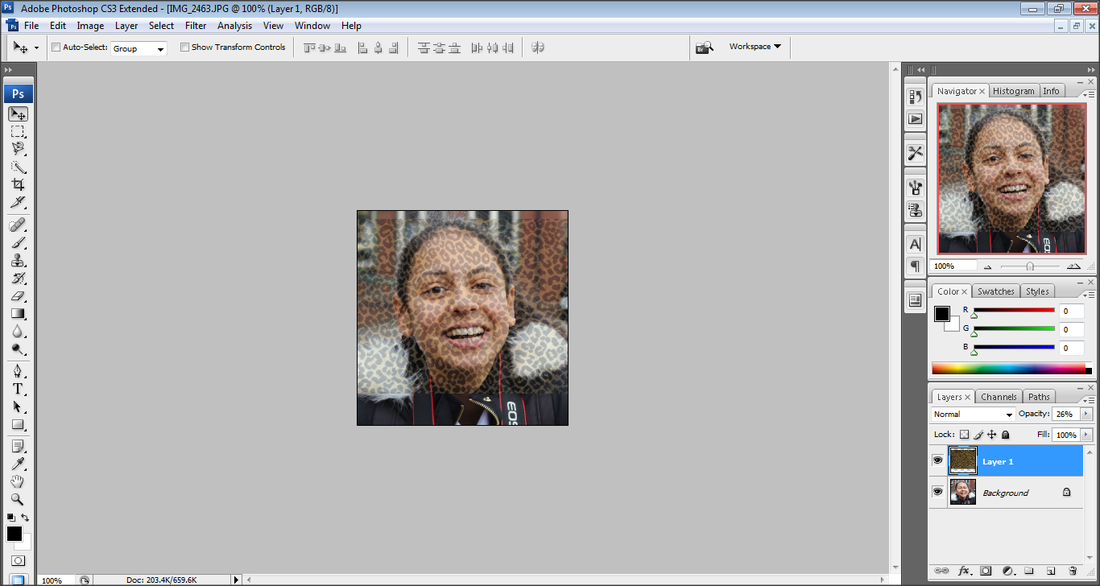
Animal Prints - Photoshop
Step 1: Firstly I chose the picture I wanted to use and clicked 'File', 'Open' and found it. Then I used the crop tool so the face and shoulders were the main focus of the picture.

Step 2: Then I found the animal print I wanted to use of the Internet and opened up in Photoshop using the same process as before.
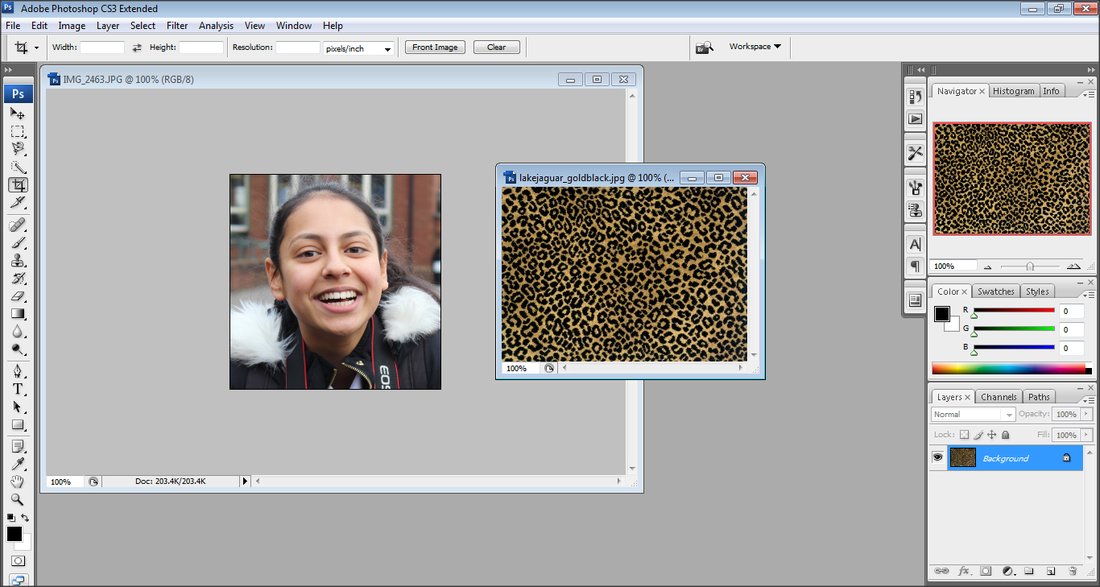
Step 3: I then dragged the animal print on top of my photograph. I needed to change the opacity of it so it became more transparent.
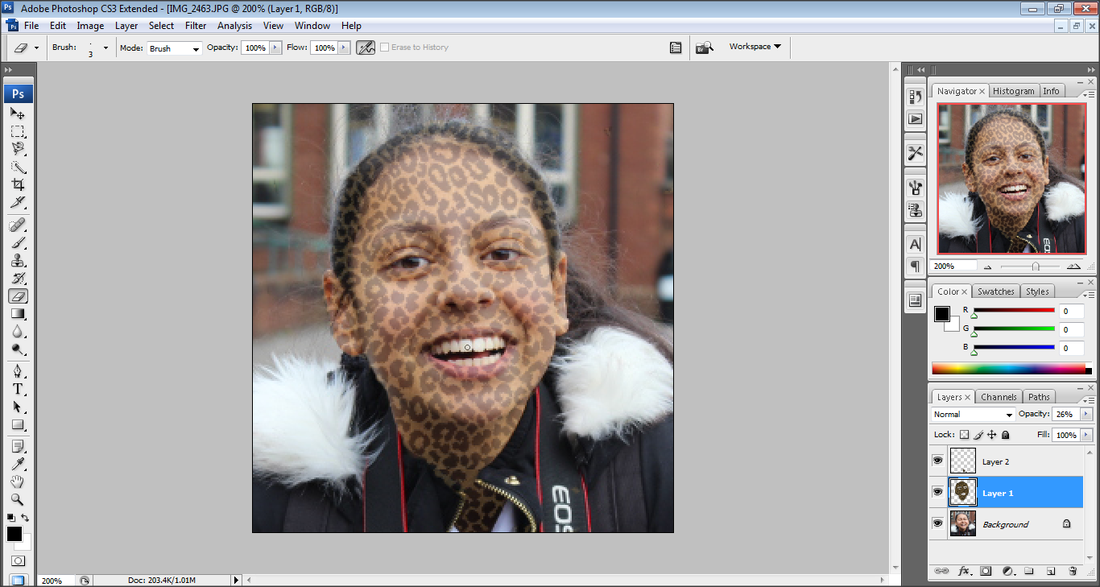
Step 4: I did the same again so I had enough print to cover her neck as well. Then using the Eraser tool I then rubbed out all of the excess print around the head and shoulders.
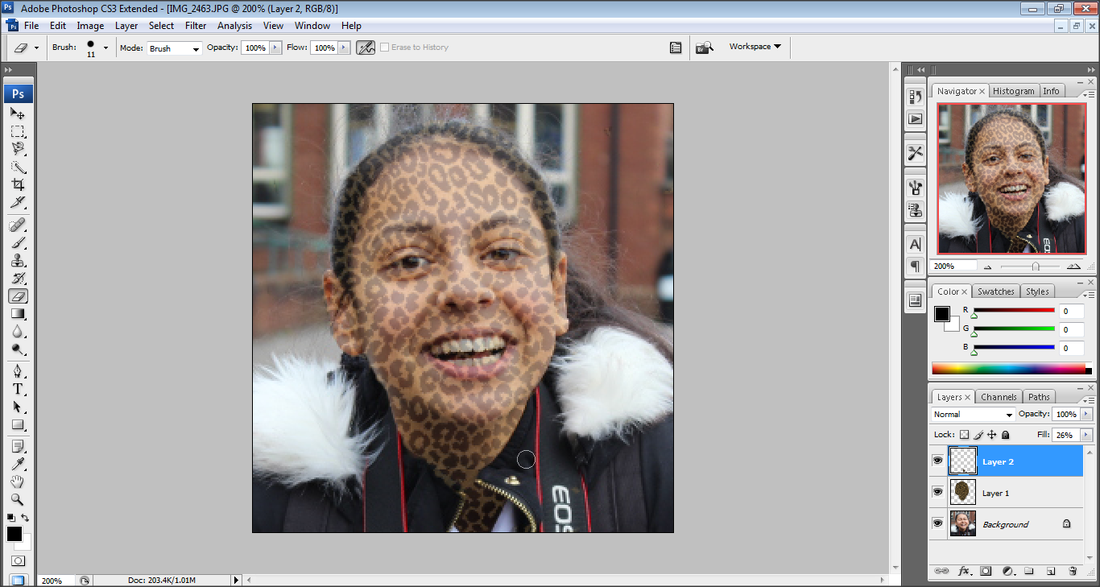
Step 5: I then changed the eraser's brush diameter from 11px down to 3px, this was so I could rub the print off the eyes, teeth and eyebrows. I did this so some of the persons features were still visible.
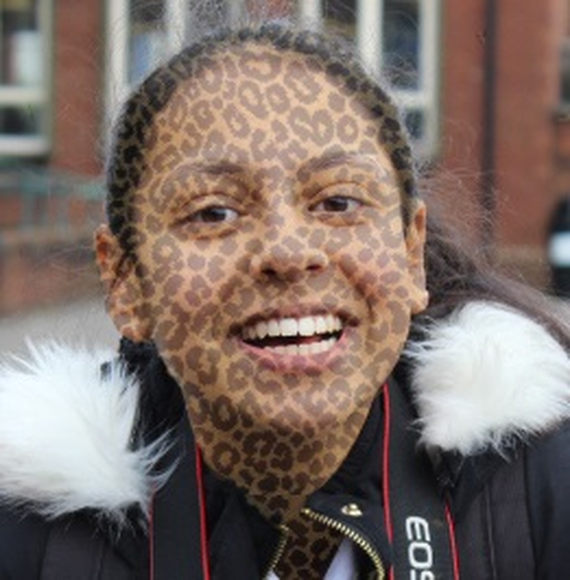
Final Piece....
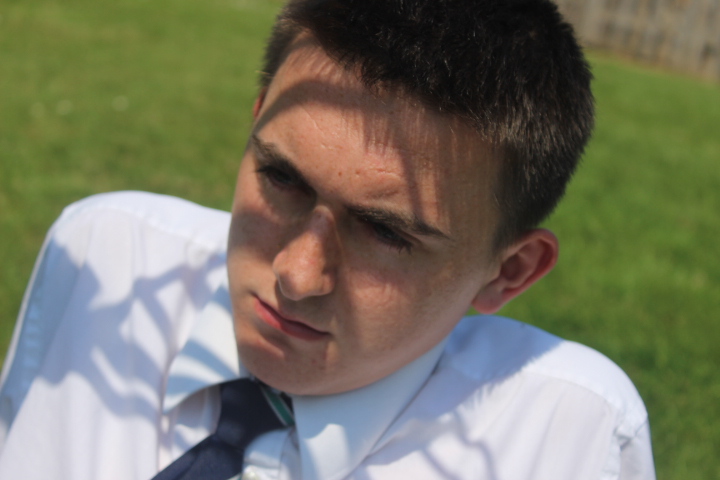
Shoot 5 - sHADOWS (Stripes)
In this shoot my aim was to capture shadows on people, so using a scissors I cut stripes into piece of paper. Then using the sunlight I then took pictures of the stripes on the boy's face. I needed to set my white balance to Daylight as I was outside and it was sunny. I wanted to use a small depth of field, F6 so my background was blurred and I'd put my focus point on the boy's face. I don't want my model to be looking down the camera, so it'll look more natural.


Worst Picture
|
This is my worst picture from this shoot as, it is slightly over exposed and the shadows were more on his shirt than on his face which is where I originally wanted them.
|
Best Picture

I like how the shadows are curved around the boy's face and how he isn't looking at the camera. Also it has a small depth of field making the grass in the background come out blurred whereas my focus point is on the face.
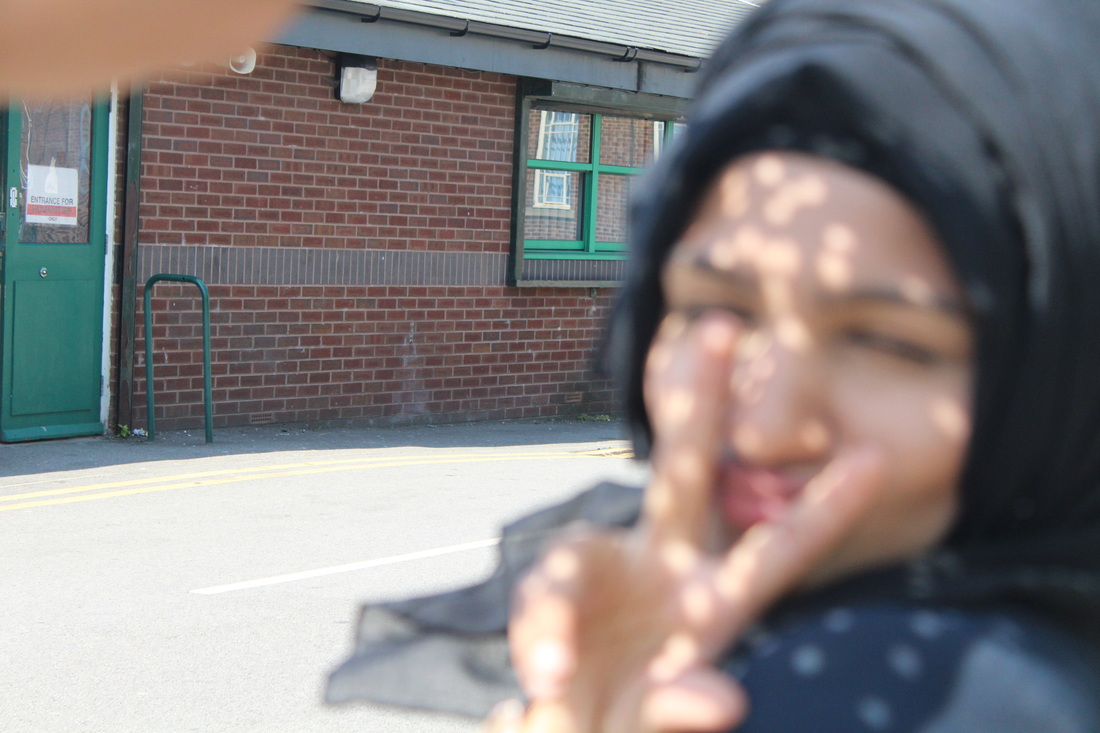
Shoot 6 - sHADOWS (spots)
In this shoot my aim was to re-try capturing more shadows on people's faces, this time I used a hole punch on a paper to get dots. Then using the sunlight I then took pictures of the spots on the girl's face. I needed to set my white balance to Daylight as I was outside and it was sunny. I wanted to use a small depth of field, F6 so my background was blurred and I'd put my focus point on the boy's face. In some pictures my model was looking away from the camera to make it seem it natural and in some pictures she looked directly down the camera.


Worst Picture...
|
This photograph would have to be the worst one from this shoot as the focus point was not set correctly, making the person be blurred and the background in focus. Meaning this picture has got a long depth of field. Also u can see a bit of the person's hand who is holding the paper in the top of the picture.
|
Best Picture...
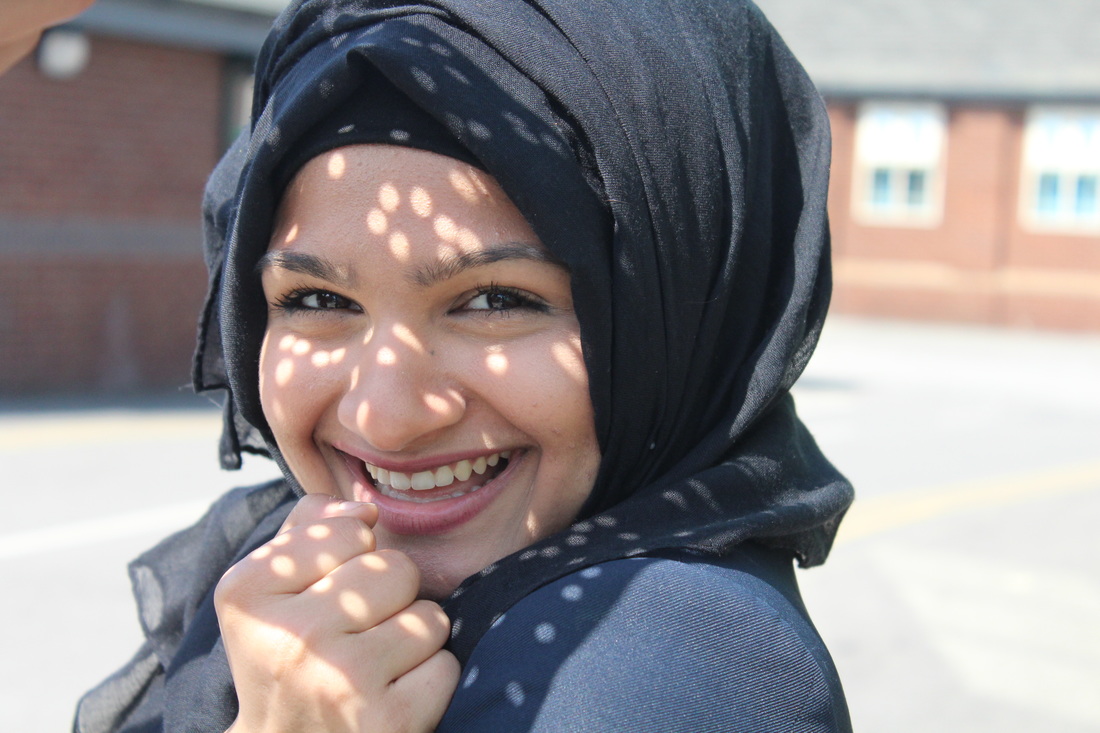
This picture would be the best photograph from this shoot as there is a clear shadow of the dots on the girl's face. There is a small depth of field as the girl is in focus and zoomed into. The background is all blurred out, and the focus point was correctly set. I like how the girl is looking straight down the camera and her emotions of happiness goes with the weather as it's sunny.
megan Kelly
In my opinion, Megan Kelly's photographs are very strong as they have been edited. I really like the use of composition as they are all close up and just focusing on women's face and she is always looking straight down the camera. She uses plain backgrounds to bring out the person more, and she tends to use faded pictures to give it more of an effect.


Jasper John


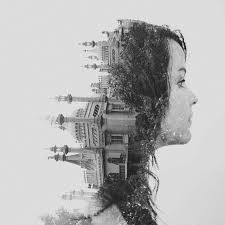


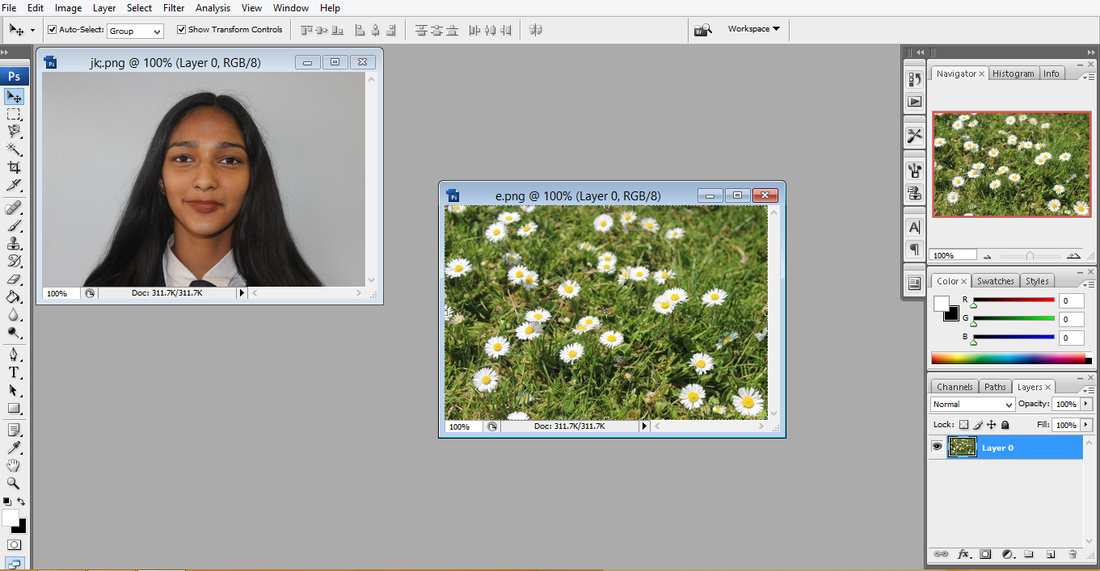
I have used Jasper John as inspiration to create my own double exposure. I have taken pictures of daisies and a girl on a plain background to make it easier to edit.
Shoot 7 - Double Exposure


My Editing
Trail 1...
Step 1: I cropped down my original picture so the girl was in the centre of the picture.
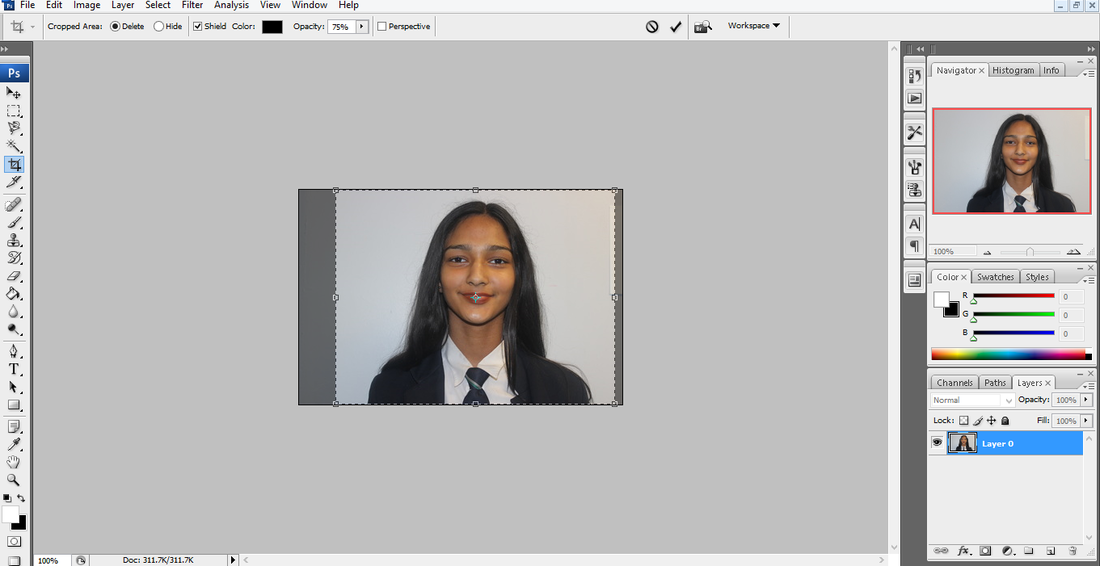
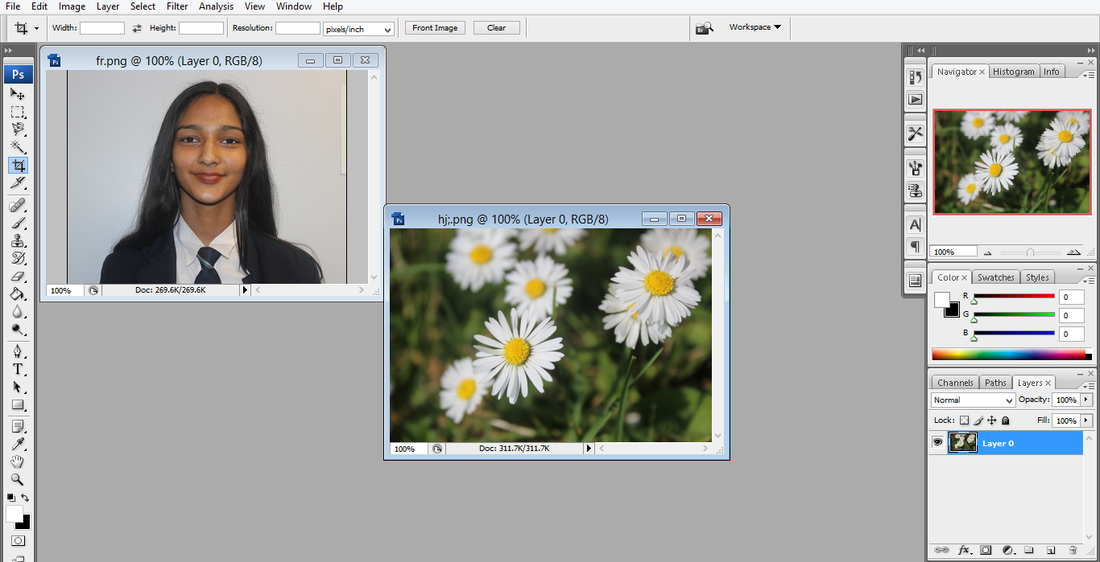
Step 2: Then I opened up the daisy picture I wanted to edit with it.
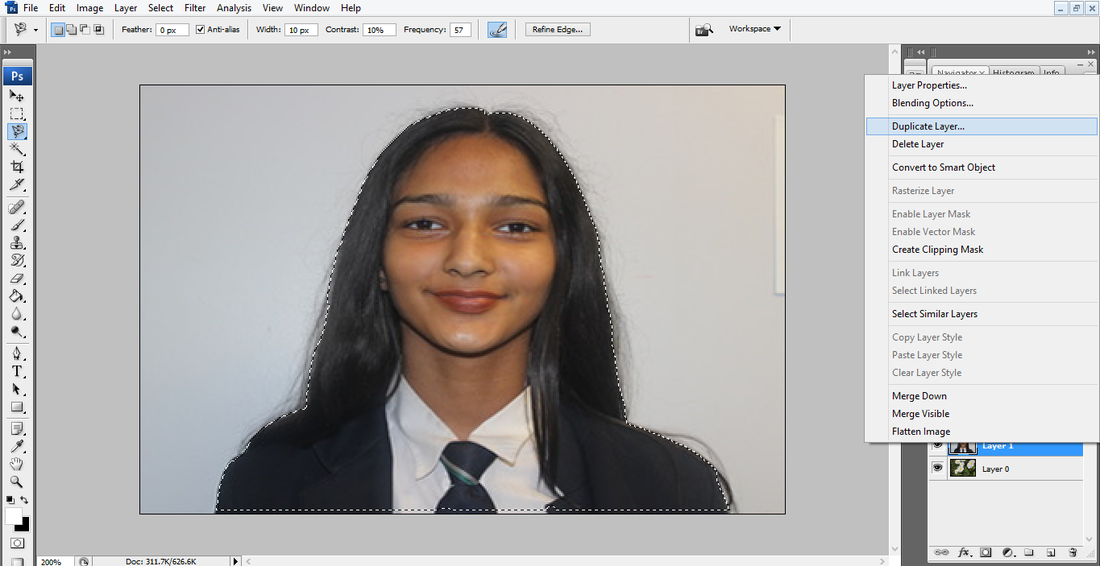
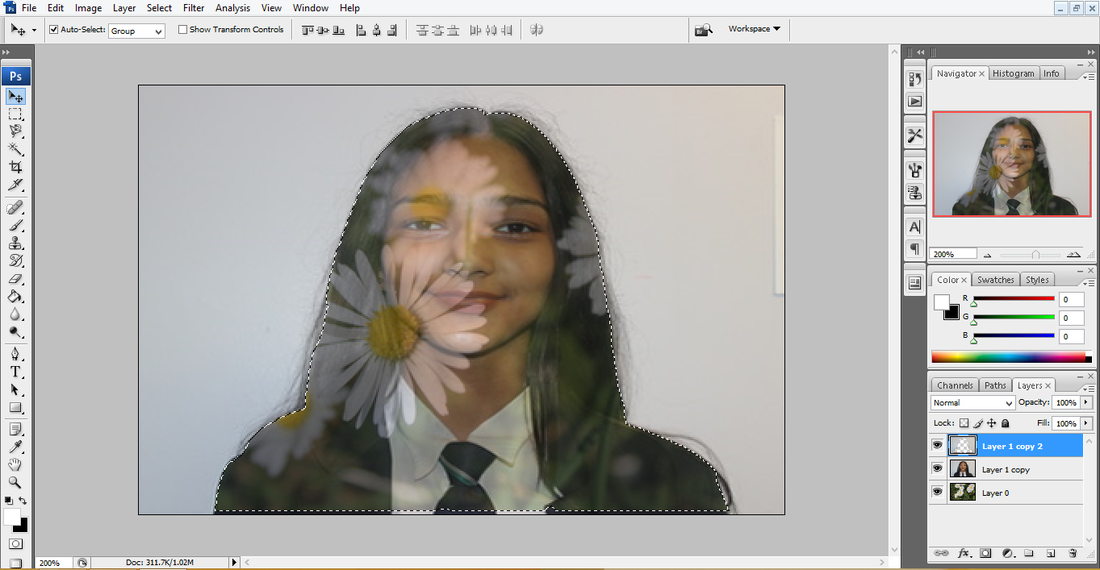
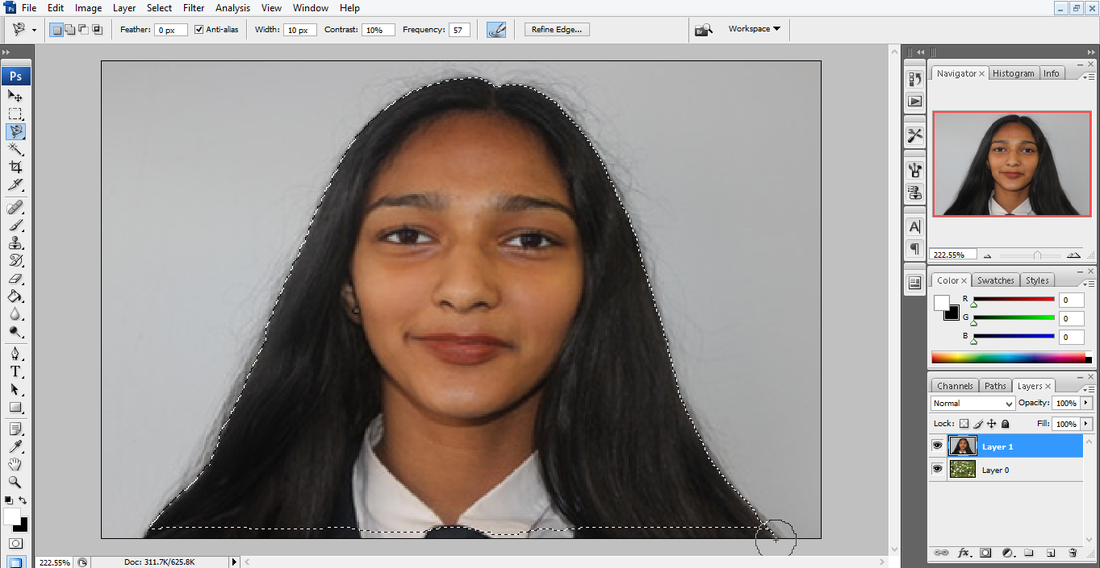
Step 3: Using the magnetic lasso tool, I drew around the outline of the girl and then duplicated the layer.
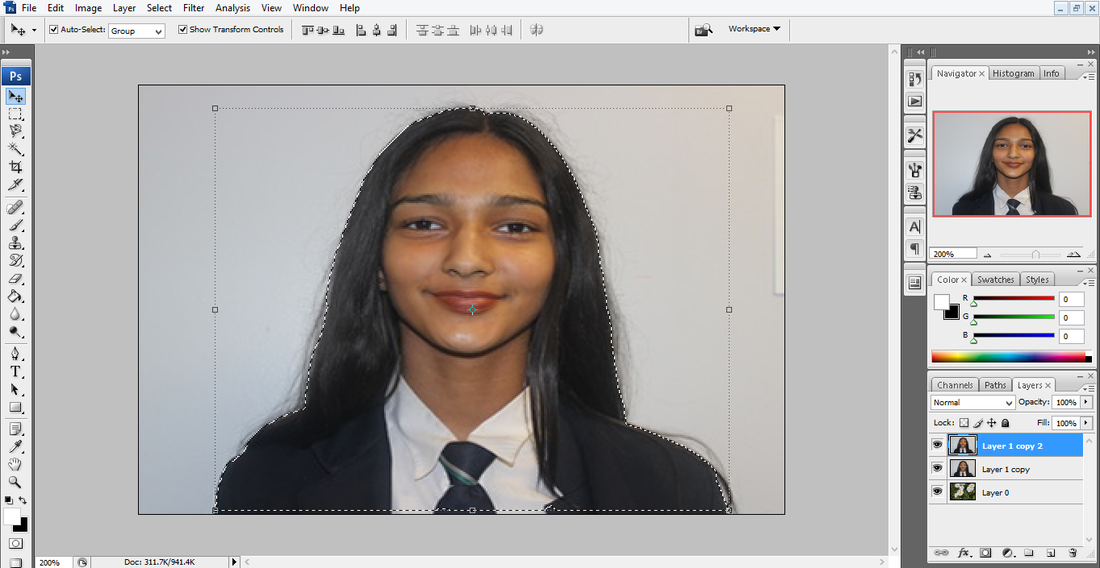
Step 4: I hid the copied layer for now and used the original layer to change the opacity.

Step 5: On the copied layer I then deleted the inner of the selected outline of the girl.
Step 6: This was so I had the original background but the changed opacity of the girls face.
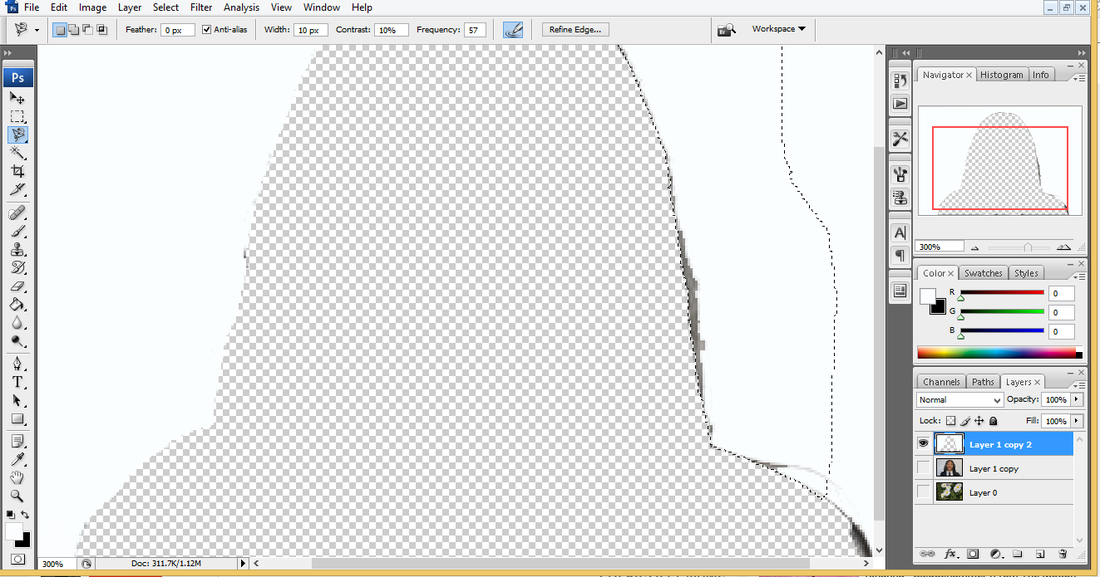
Step 7: The original background them needed tidying up, so to do this I hid my other layers and worked on the copied layer which was just the background of the photograph.
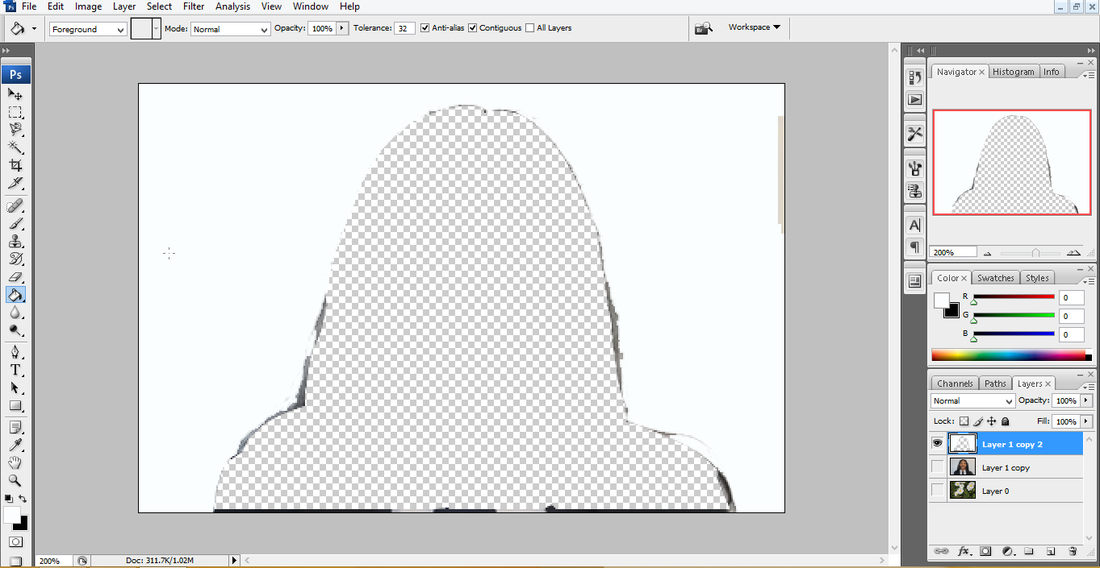
Step 8: I decided to change the background totally white, so using the magnetic lasso tool I selected the background around the girls outline. Then once selected, using the paint bucket I changed it to white.
Final Piece...

Trail 2...
For this editing I used a landscape picture that I took during my trip to Anglesey to do my double exposure.
Step 1: I followed the exact same procedure as above, only this time I changed the picture of the girl and the background.
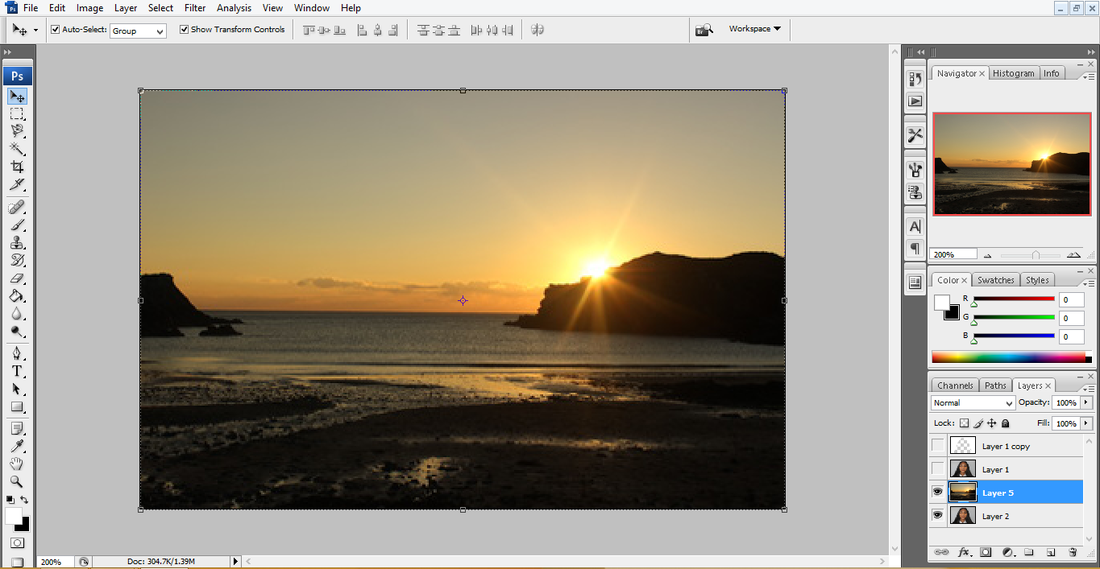
Step 2: I then tided up the original background and changed it to white as before.
Final Piece....

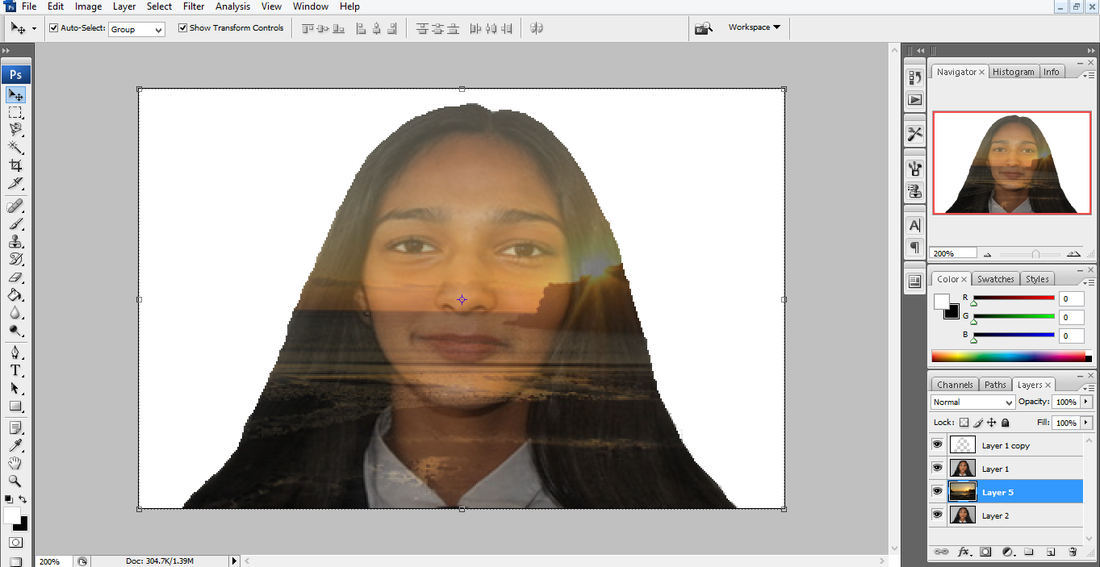
Trail 3...
Step 1: Firstly, I opened up the two pictures I had chosen to edit together.
Step 2: I put the picture of the girl on top of the daisy background. Then using the magnetic lasso tool I drew around the outline of the girl.
Step 3: I then kept that selected and duplicated the layer of the girl.
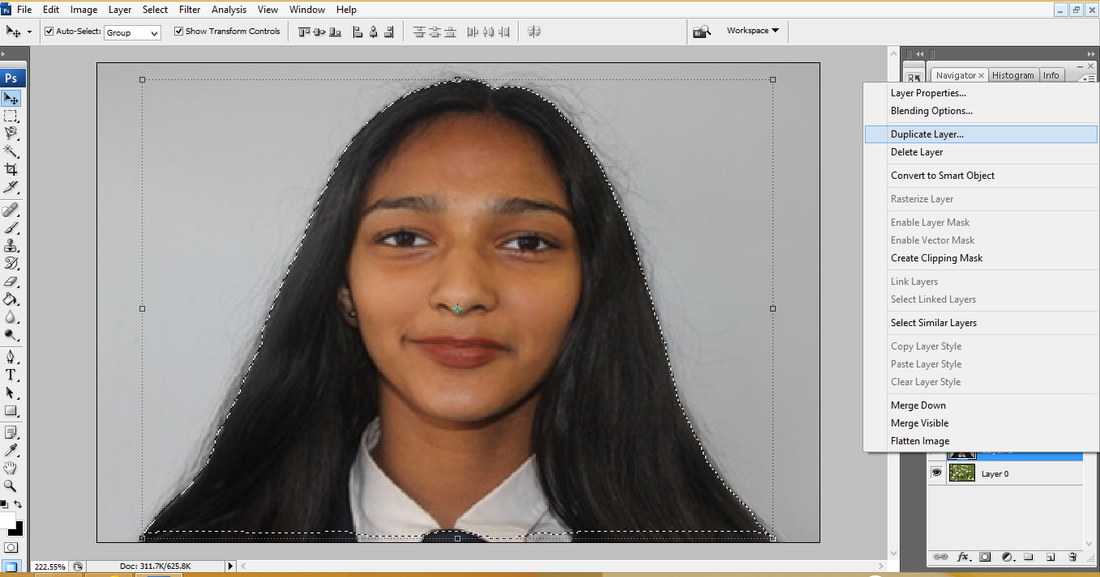
Step 4: I hid the copied layer and then changed the opacity of the original picture of the girl.

Step 5: I then deleted the selected bit on the copied layer so I have the original background on the picture I have just changed the opacity of.
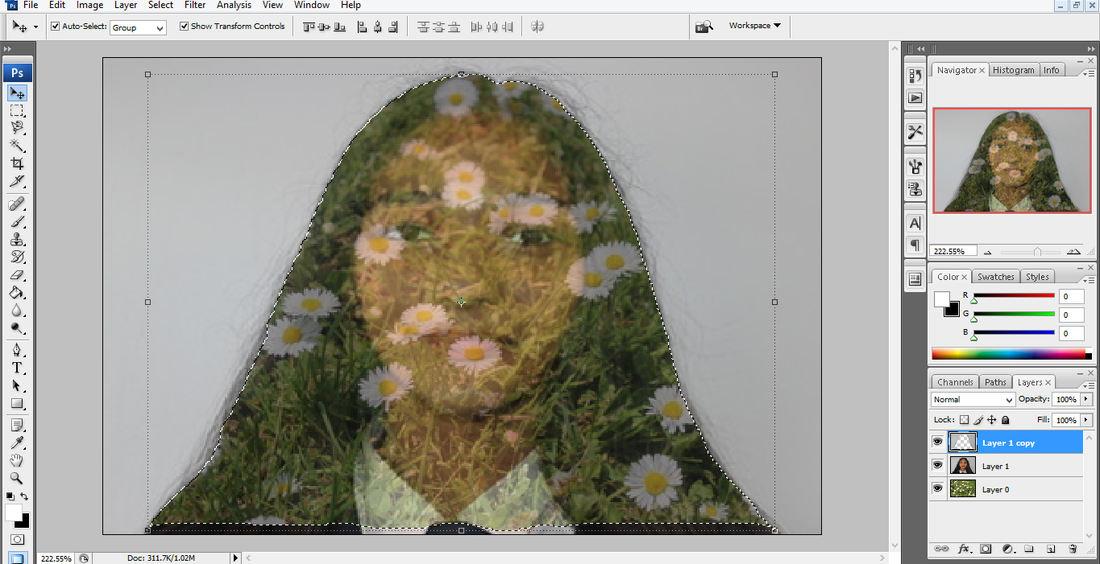
Step 6: Using the magnetic lasso tool I drew around the outline of just the face, which I then kept selected and deleted it off the background of the daisies.

Step 7: Finally I then changed the original background to white and tided up the outline.

Final Piece...

Trial 3....
For this editing, the 2 scenery pictures I have used I took outside of school in my own time on holiday and used a picture from my reflection shoot.
Step 1: I cropped down the picture to the size I wanted it.
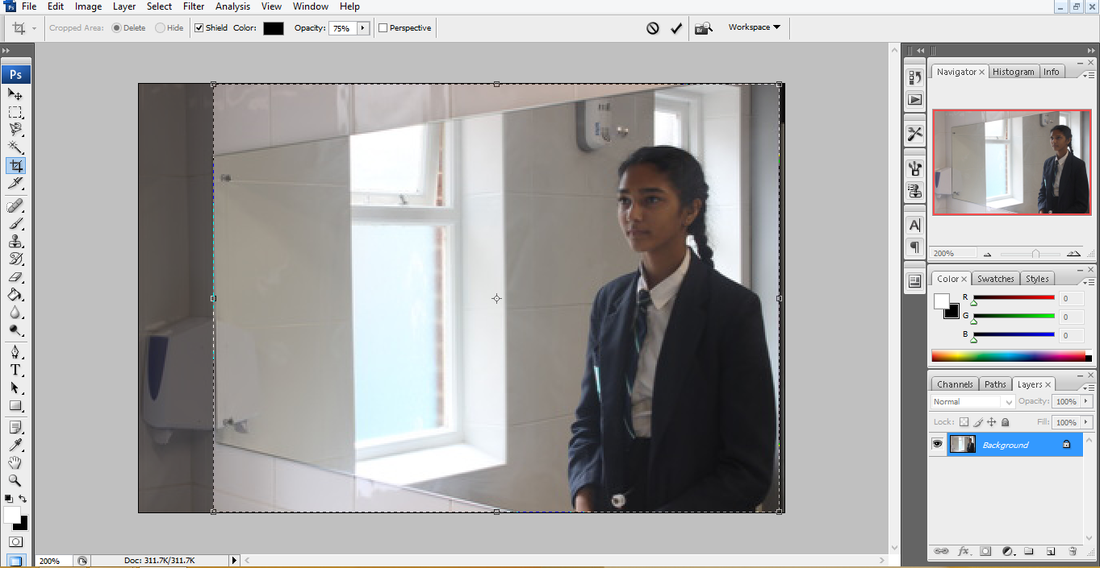
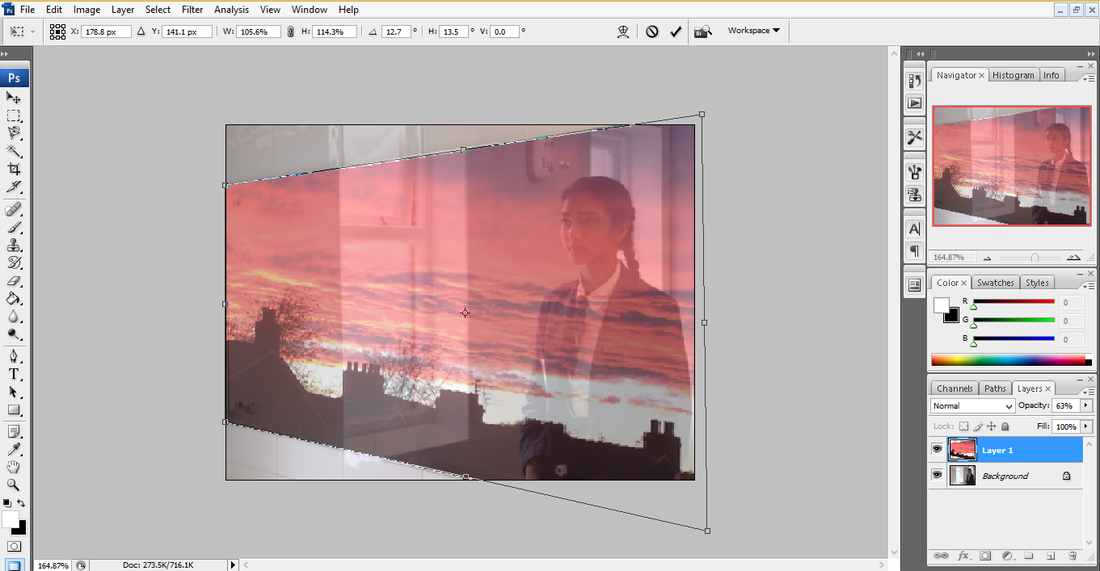
Step 2: I then changed the size and perspective of the background picture to line up with the mirror. Then I changed the opacity so you could still see the reflection in mirror.
Step 3: On the original photograph I then using the magnetic lasso tool, I drew around the outline of the girl. Then keeping it selected I went on the layer of the scenery picture and deleted it from there.
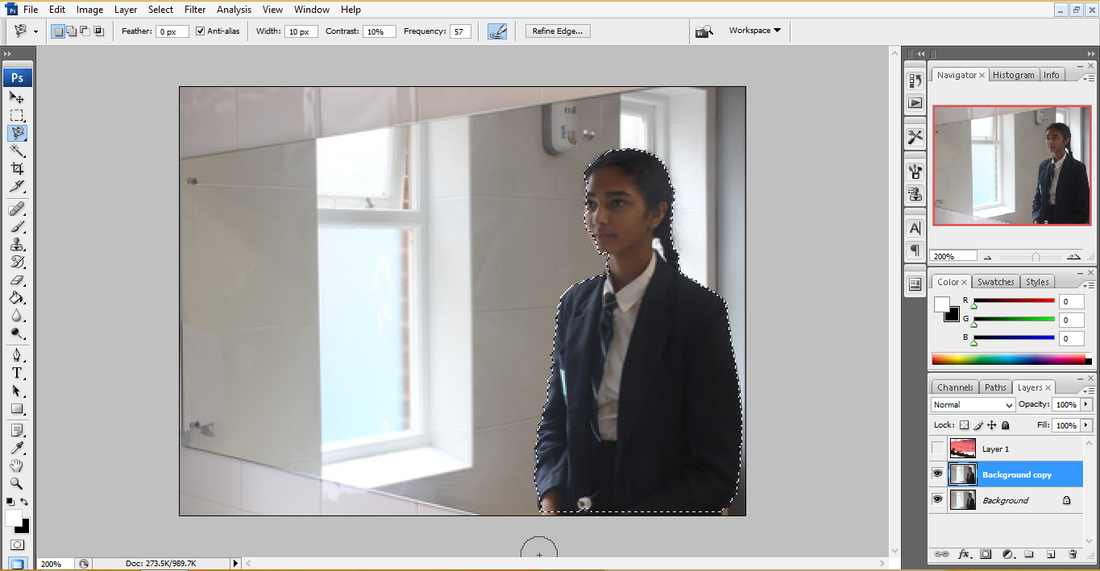
Final Piece...

Attempt 2....

Trail 4...
For this editing, I used the exact same procedure as above but instead I used a different picture from the reflection shoot and a different scenery picture which I took outside of school. Although I didn't do step 3 and instead I left the reflection covered in the scenery picture.
Final Piece...
Wall Of The Greatest...


Evaluation...
Overall, this unit has gone really well and each one of my shoots turned out exactly how I wanted them to. I have showed and completed really creative edits which I'm proud of. I have also edited one of my pictures in the style of certain photographers, which has showed the purpose of my research. I've used different photographers as inspiration for shoots as well as editing. If I was to do this unit all over again, to improve it I would try and take pictures from different angles such as worms eyeview to see the difference and the effect it has on the picture. I would also try and do some more editing, which would be completely different to what Iv'e done and instead try more complex things on Photoshop.
